

The adventures of working on my enormous dollhouse.
Showing posts with label 1930s. Show all posts
Showing posts with label 1930s. Show all posts
Thursday, December 15, 2022
Mr. Messenger's Study and His Swivel Chair
I have began to work on a new room, based off one of my favorite books as a very young child, Annabel's House, by Norman Messenger. It is a book with drawings of an Edwardian house with lots of flaps that you can pull to reveal things inside the cupboards, etc. One of my favorite rooms in the book is most likely the study, and I am basing a room in my dollhouse after it.
I am a visual person, so I wrote on scraps of papers and arranged them around the room until I found an arrangment I liked.
 The room posing as the study is actually going to be the kitchen, and the study will probably be either on the third or fourth floor. I got to work making the swivel chair for the desk. It's a bit tippy, but it stands upright in the kitchen. I had to prop it up in Anthea's Room - I think her floor might be a bit uneven in places. It's an old house, after all!
I don't quite know what I based the chair after - I did hunt for a bit of inspiration on Google, searching for '1930s swivel desk chairs', and based it a bit off of those. While it doesn't swivel, I'm still happy with it.
The room posing as the study is actually going to be the kitchen, and the study will probably be either on the third or fourth floor. I got to work making the swivel chair for the desk. It's a bit tippy, but it stands upright in the kitchen. I had to prop it up in Anthea's Room - I think her floor might be a bit uneven in places. It's an old house, after all!
I don't quite know what I based the chair after - I did hunt for a bit of inspiration on Google, searching for '1930s swivel desk chairs', and based it a bit off of those. While it doesn't swivel, I'm still happy with it.

 I'm planning on posting before the holidays, but if I don't, happy holidays to you and yours!
Saturday, November 26, 2022
Up In The Attic
The attic in Lockwood Manor has an odd configuration: the ceiling isn't large enough for it to be an actual room, so I had always planned on all of the rooms to be playhouses, little hideaways, or perhaps even extra bedrooms if there were too many guests.
 For some odd reason, I had an idea to create a tiny bit of a hallway next to the North Attic Bedroom, barely more than an inch wide. While I do not have any photographs of it, I do have two images of the door that led to it. The door and that wall (on the right of the top image) were a placeholder for when I built a better door that actually worked and had hinges.
 Yesterday, I decided it was high time to demolish that wall and build the permanent structure.
 As seen in this image, the wall extended all of the way to the floor. This was also just a placeholder: when the time came I would add a knee wall.
 First, I had to rip out the wall with the fake door so I could demolish the tiny hallway. Ripping out the wall also ripped out some of the wallpaper I had used in the hallway (the reverse of the wallpaper I had used in the North Attic Bedroom). The problem with this was that I didn't know where the wallpaper I had used for the North Attic Bedroom was. It was actually real-life wallpaper, so I couldn't just print some out. Try as I might, I couldn't figure out a way around this, so I put it off.
 When I tried to pull off a baseboard that I had attached to the wall, it also pulled off a bit of wallpaper, but this was fine because it would be covered by the knee wall.
 Luckily, most of this mess would be covered up by the knee wall.
 I built a mockup of sturdy cardboard and wood for the knee wall, and decided I liked it.
 That was the space I would lose by adding a knee wall. At first, I thought I could add wiring, but I hate dealing with the electricity, so I left it off.
 I was too carried away to take any photos during construction, but that was the result after I had added all of the paneling.
 I still had to add the top of the paneling as you can see in this photo.
 All done! Except for the wallpaper. This I couldn't figure out until I looked at the wall that I had demolished from the fake door. It still had some wallpaper on it.
 I glued it in. I didn't want to risk ripping the wallpaper while pulling it off of the piece of wood, so I left the piece of wood there, which is why it protrudes out a bit. The wallpaper didn't quite reach the top of the wall, but this was fine because I was going to add paneling there anyway.
 After I had finished gluing it in, the knee wall looked like that.
 The front view. I had finished paneling where the wallpaper didn't reach the top of the wall.
 Unfortunately, where I pulled away the wall with the fake door left glue marks. I wanted to cover that up with wood flooring, but a bit of a disaster episode ensued, so I figured I could do it some other time, and added a coat of paint to it. With a carpet on top, you can't even tell the difference.
  There is the mockup of the wall!
 Unfortunately, there is a gap between the attic that is part of the section with the Nursery and the section with Anthea's room. Hopefully, I can cover this up with trim.
 Most of the problem is due to a piece of wood that bumps into the knee wall, so the sections don't sit flush to each other. I will remove the piece of wood, and hopefully the gap will subside.
 I also added trim to the top of the wall, which makes it look a lot neater!
 A photo shoot of the knee wall ensued. The radio is a placeholder.

 The paneling is completely done! There is a little nail in the wall because it was there when the wall was part of the fake door, and unfortunately it's stuck quite tight so it's impossible to remove.
You'll just have to play along with me that the knee wall was there all along and was part of the 1925 renovation of the attic :-)
The paneling is completely done! There is a little nail in the wall because it was there when the wall was part of the fake door, and unfortunately it's stuck quite tight so it's impossible to remove.
You'll just have to play along with me that the knee wall was there all along and was part of the 1925 renovation of the attic :-)
 Hopefully I will be back soon with the North Attic Bedroom complete!


Thursday, November 3, 2022
On the Subject of Servant's Rooms - Yet Again
If you'll pardon the lengthy introduction, while I was rummaging through my email I was rewarded with an old email sent about a year ago, with plans for the wallpaper of the servant's rooms. And noted there were even the names for the servants: Sara, Sally, Bessie, and two unamed servants (poor them!).
The idea for the servant's rooms, if I recall, was to have them be matching, but not quite; matching wallpaper stripes, but in different shades of brown, matching layout for bed, washstand, etc.
I'm still quite fond of the idea, I'll admit, for I liked the thought of having about five matching servant rooms but each with their own personal touches so one could see how they differed.
I seemed to have been going through quite an obsession with the wallpaper "Annabelle Stripe" from Itsy Bitsy mini, for my selections were all different shades of the same wallpaper.
I also, in that email, had made a note to myself to order them in 1:24 scale, not 1:12, so the stripe would be smaller.
I still love the idea for the matching servant's rooms - so I thought, why not?
 Ah, how I love plans! I'm going to put this project on hold for a bit - I already have a lot going on in the Manor, and I also have to complete a few rooms before I work on new ones! Besides, the back part of the dollhouse will need to be constructed before I can begin work on these servant's rooms, but in a few years, maybe I'll have these completed.
Who knows?
Ah, how I love plans! I'm going to put this project on hold for a bit - I already have a lot going on in the Manor, and I also have to complete a few rooms before I work on new ones! Besides, the back part of the dollhouse will need to be constructed before I can begin work on these servant's rooms, but in a few years, maybe I'll have these completed.
Who knows?

Monday, October 31, 2022
The Governesses
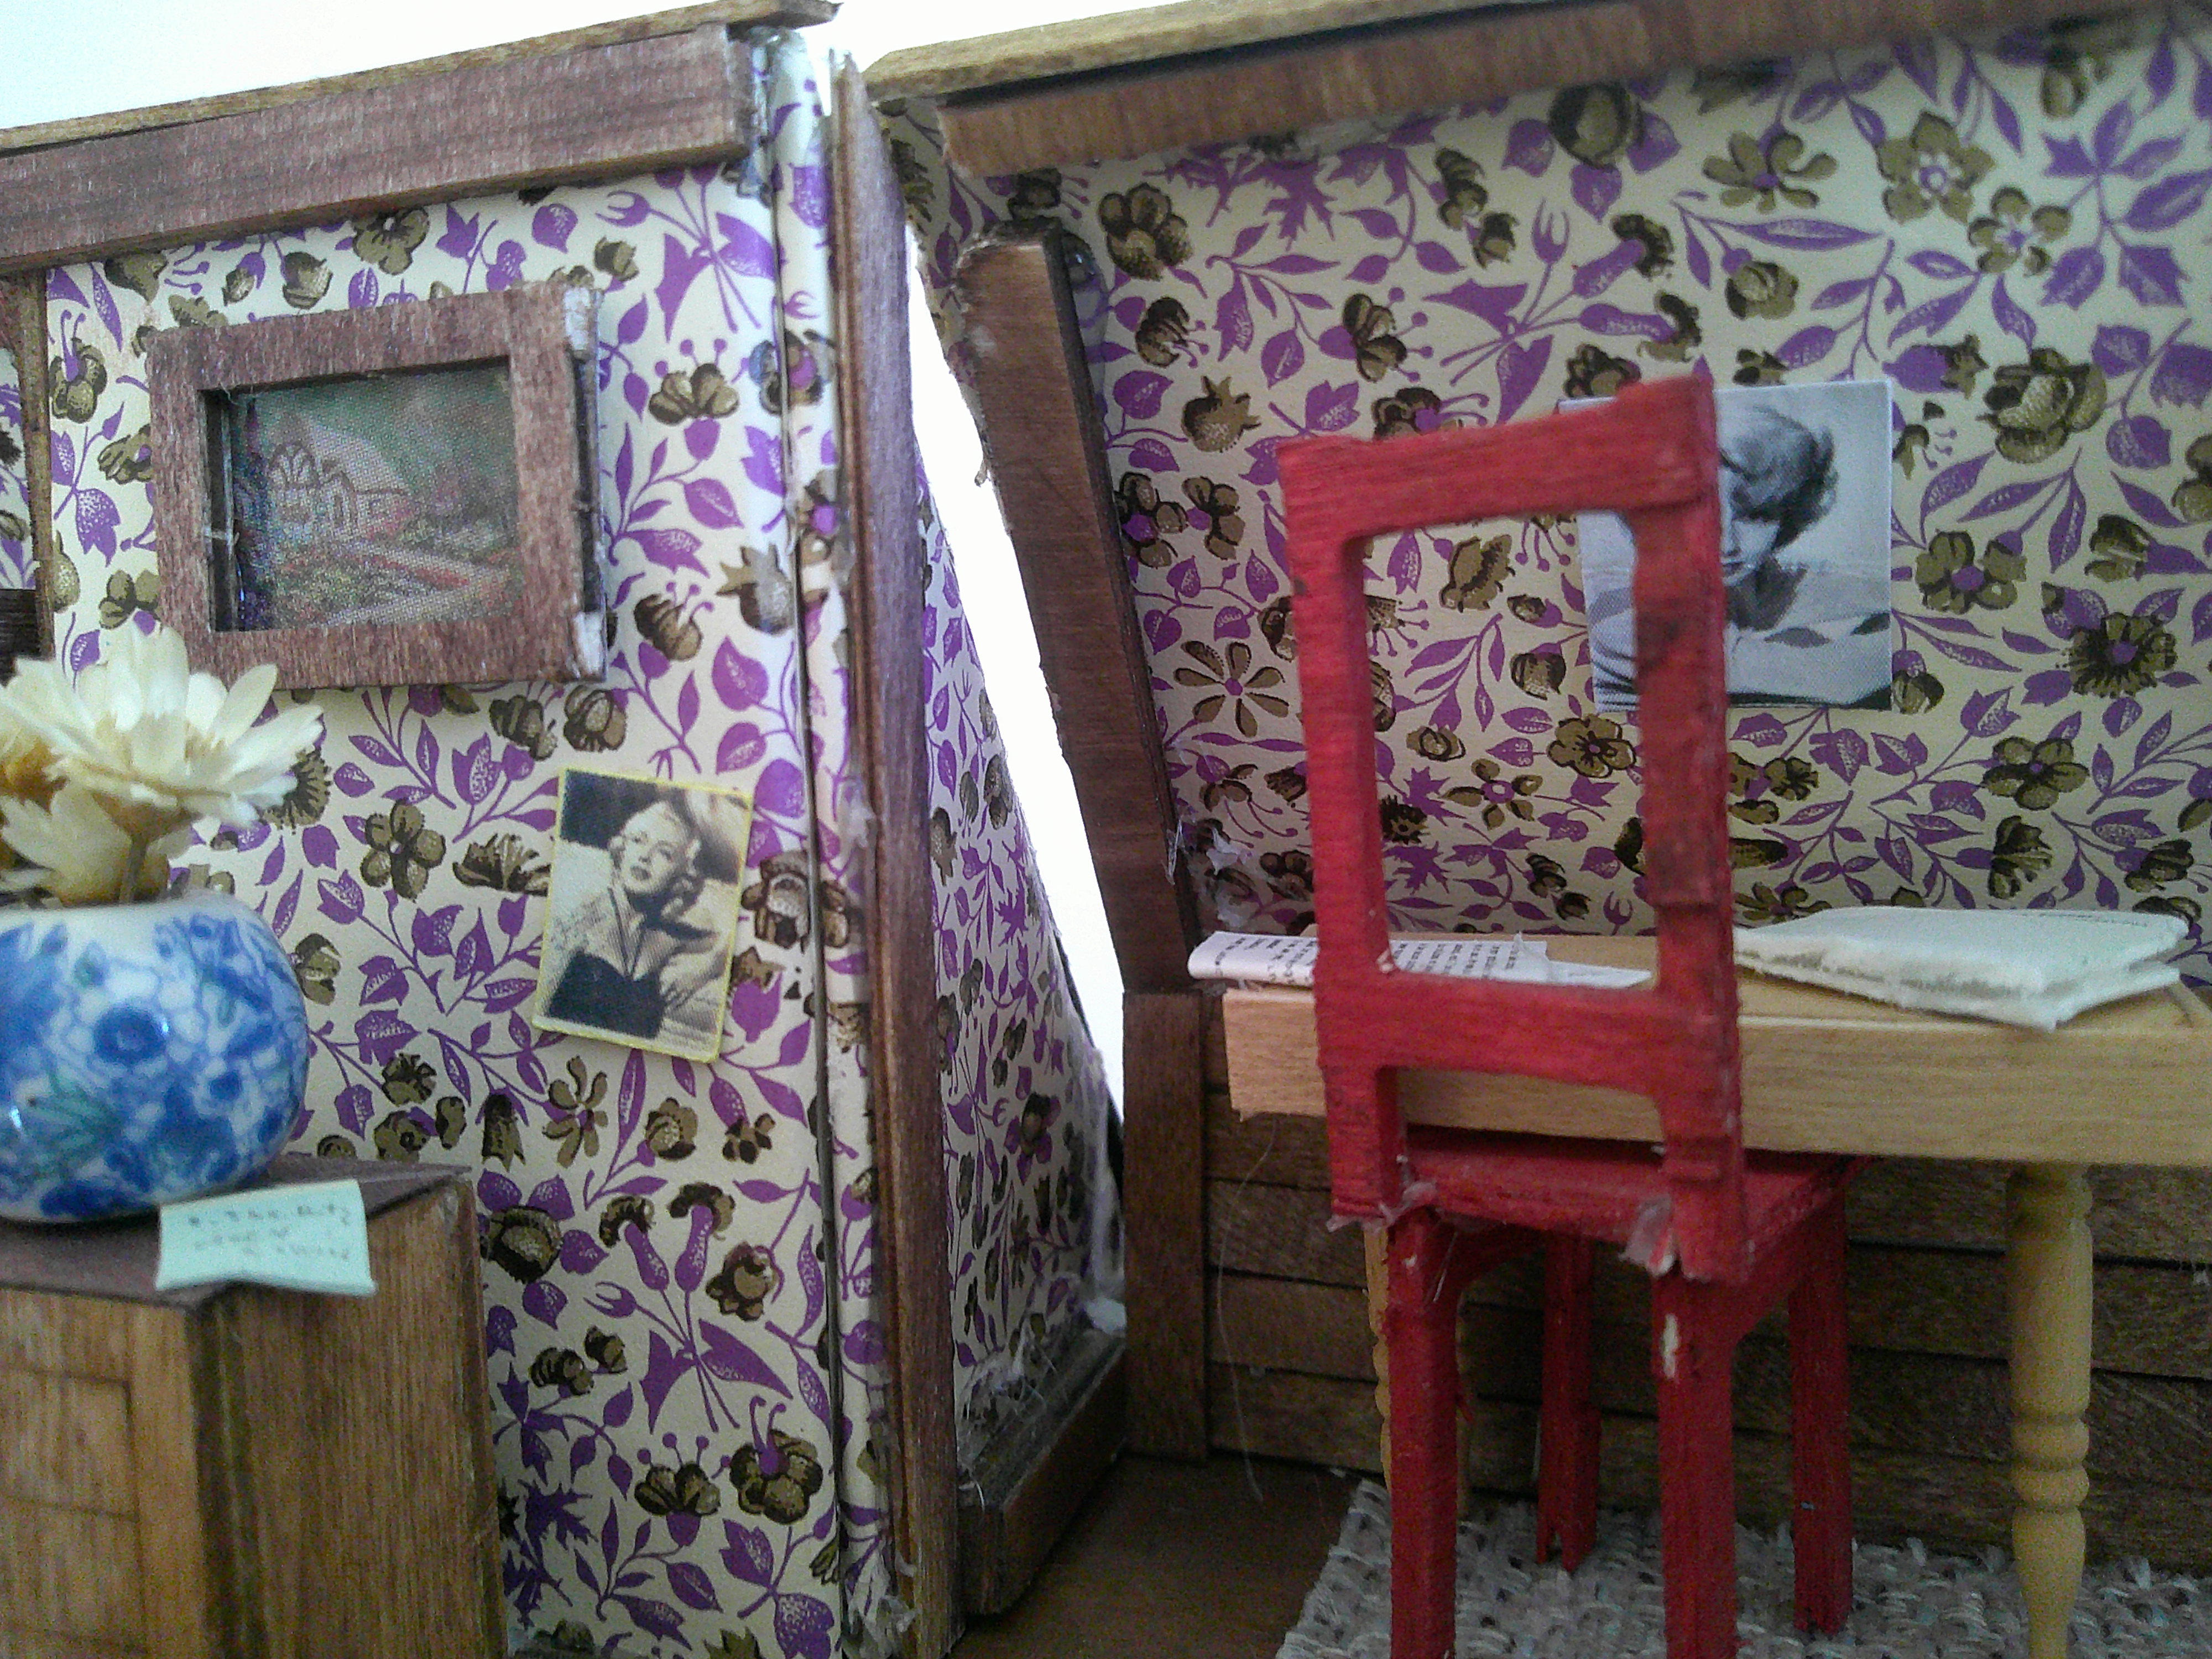
During the Victorian era, the governess for the Lockwood children was named Miss Leopold, and was not very well liked by the Lockwood children. She was a stiff, upright woman with a stern face, and always carried around her cane - not because she needed it to support herself, but because she enjoyed threatening to thwack children with it. Her bedroom was very reminiscent of herself; very stiff, upright, no-nonsense and formidable. It was very old-fashioned, with an iron bed, a pitcher and washstand, and old Victorian posters on how to bring up children. That was the old Governess, and that was the Old Governess's Bedroom.
Now, it was being used as somewhat as a hideout for the Lockwood children: they used it as the pirate's ship, the headquarters of a spy agency, or whatever they pleased. They laughed over the old-fashioned posters that were hung about the room, and clambered into the imposing wardrobe to pretend they were in Narnia. In all, nothing that the Governess would have approved of.
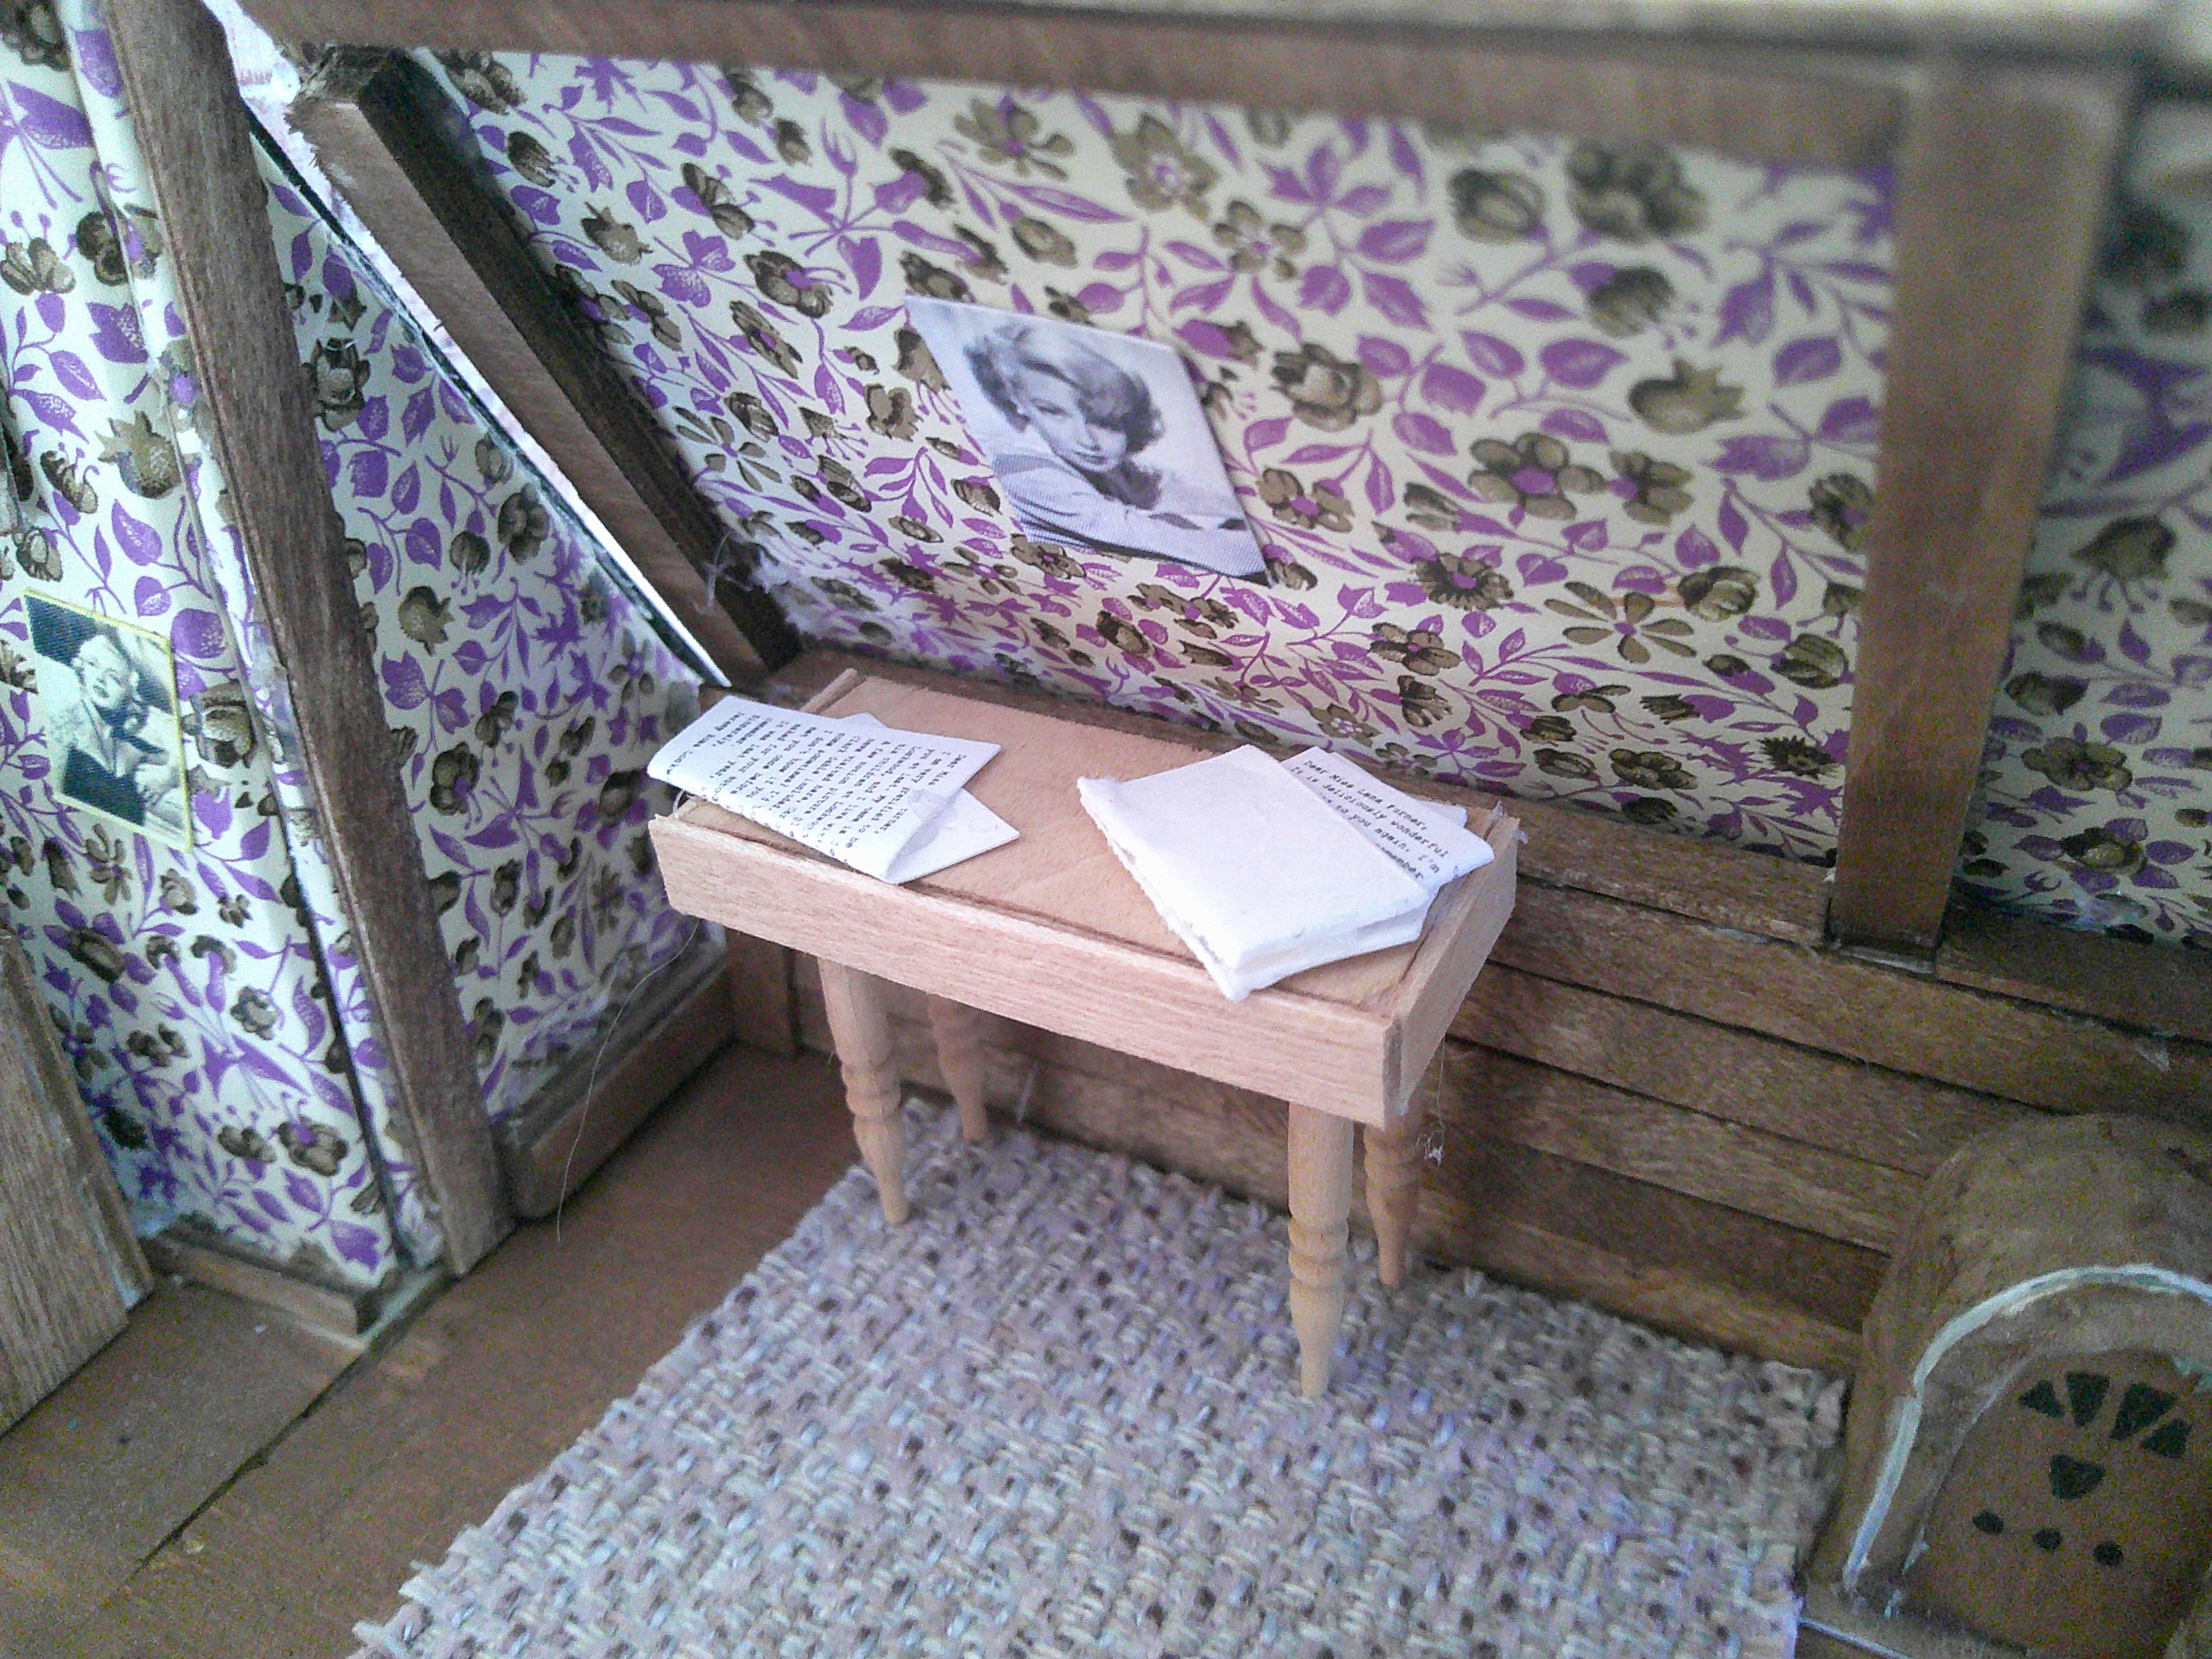
 That was her room now - and I need to construct it! There will be no accessories, because Miss Leopold has passed on, and after all, hasn't lived there for almost half a century. I will need to make a 'stiff and imposing wardrobe', an iron bed, a small table with a lamp that Miss Leopold used to write on, and a washstand with a pitcher and basin. I will also need to make (or rather, print out) posters from the Victorian Era on how to bring up children, because they rather seem like something Ms. Leopold would want. I will also need to make little books from the Victorian Era on education, dusty spelling books, musty arithmetic books, and crumbling reading books. Speaking of Victorian books, I am lucky to possess an original Victorian McGuffey's Eclectic Reader. I would take a photo to show it to you, but I would rather not sort through piles of crumbling books at the present. Anyhow, Miss. Leopold must possess McGuffey's Electic Reader. She simply wouldn't do without it.
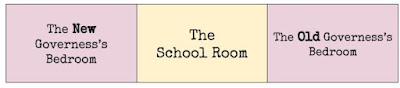 But now we travel fifty years later, to the 1930s, with a New Governess and a New Governess Bedroom. Hence the name, the Old Governess's Bedroom and the New Governess's Bedroom. And the name of the new Governess? Miss Jessel. There are no reasons behind the choice of name, it just struck my fancy.
Miss Jessel, oh the contraire, is quite the opposite of Miss Leopold. She's very kind and understanding, yet still stern enough to be a firm hand with the children. She lives in a room on the third floor, adjacent to the Old Governess's Bedroom and the Schoolroom (which I simply must construct! I have some terrific ideas for it, but we'll have to see if they can become reality. . .) Miss Jessel's room was updated in 1932, so of course, it's at the height of modern conveince. (No pitcher and washbasin for her!) I also possess a score of 1920s Educational Books (yes, I do have a collection of old books), which will be quite useful in the construction of Miss Jessel's room. It's also rather amusing to compare the 1920s teaching methods with McGuffey's 1860s teaching methods, which I suppose would the equivalent of comparing Miss Jessel with Miss Leopold.
I'm going to have a lot of fun constructing these rooms - mainly becuase they can be such a different mix of styles. I will also make one of my favorite 1930s Fireplaces for Miss Jessel, but perhaps this one will be in beige or a light brown.
But now we travel fifty years later, to the 1930s, with a New Governess and a New Governess Bedroom. Hence the name, the Old Governess's Bedroom and the New Governess's Bedroom. And the name of the new Governess? Miss Jessel. There are no reasons behind the choice of name, it just struck my fancy.
Miss Jessel, oh the contraire, is quite the opposite of Miss Leopold. She's very kind and understanding, yet still stern enough to be a firm hand with the children. She lives in a room on the third floor, adjacent to the Old Governess's Bedroom and the Schoolroom (which I simply must construct! I have some terrific ideas for it, but we'll have to see if they can become reality. . .) Miss Jessel's room was updated in 1932, so of course, it's at the height of modern conveince. (No pitcher and washbasin for her!) I also possess a score of 1920s Educational Books (yes, I do have a collection of old books), which will be quite useful in the construction of Miss Jessel's room. It's also rather amusing to compare the 1920s teaching methods with McGuffey's 1860s teaching methods, which I suppose would the equivalent of comparing Miss Jessel with Miss Leopold.
I'm going to have a lot of fun constructing these rooms - mainly becuase they can be such a different mix of styles. I will also make one of my favorite 1930s Fireplaces for Miss Jessel, but perhaps this one will be in beige or a light brown.
 And we mustn't forget the schoolroom - I'm thinking that we need a door leading from the New Governess's Bedroom to the Schoolroom - and we'll pretend that there was once a door leading from the Old Governess's Bedroom to the Schoolroom, but they covered it up when Miss Leopold left (Probably much to the glee of the children she once governed, knowing how much they disapproved of her).
I've found a bunch of terrific inspiration photos for rooms of Victorian governesses, but nil for photos of the 1930s governesses. I mean, what can I say? It was the Great Depression, after all. Did they have a governess for the children in Downton Abbey? It takes place around the 20s and 30s, doesn't it?
And we mustn't forget the schoolroom - I'm thinking that we need a door leading from the New Governess's Bedroom to the Schoolroom - and we'll pretend that there was once a door leading from the Old Governess's Bedroom to the Schoolroom, but they covered it up when Miss Leopold left (Probably much to the glee of the children she once governed, knowing how much they disapproved of her).
I've found a bunch of terrific inspiration photos for rooms of Victorian governesses, but nil for photos of the 1930s governesses. I mean, what can I say? It was the Great Depression, after all. Did they have a governess for the children in Downton Abbey? It takes place around the 20s and 30s, doesn't it?
 Above is an empty and rather derelict room in my dollhouse. In the center is a bed that could do for Miss Jessel, but I fancy something different for her. Also, the bed is a bit low for my tastes, so we'll just have to see.

 Also, on a side note, in terms of actually progress (not just planning), I finished constructing the trim around the Nursery and the Scullery, so now I can thankfully say that their interiors are complete! (I would say that the Scullery is complete, but I have to finish the outside.).
 And soon to come: I need to write some about the servant's room I've been working on for the Stable boy that lived there in the 1860s, but is now home to the Mechanic who fixes the Packard 120 that belongs to the family in the dollhouse!
(Sneak Preview below!)
And soon to come: I need to write some about the servant's room I've been working on for the Stable boy that lived there in the 1860s, but is now home to the Mechanic who fixes the Packard 120 that belongs to the family in the dollhouse!
(Sneak Preview below!)
 I've also gathered lots of good information from the vast amount of floorplans online of Bear Wood, a beautiful house designed by Robert Kerr. If you have the oppurtunity to look at some of the plans you can find online, I highly recommend that you do.
I've also been eagerly awaiting the arrival of more roomboxes - about twelve boxes are coming there way!
Also, I've been having a long debate with myself: Should I rename Lockwood Manor to Clarendon Manor? Clarendon sounds fancier, but then, over the years, I've devoted an awful lot of time to plans and papers (not to mention this blog) of the dollhouse, that all have the name Lockwood Manor. If you have any suggestions, please let me know!
Have a wonderful Halloween!
I've also gathered lots of good information from the vast amount of floorplans online of Bear Wood, a beautiful house designed by Robert Kerr. If you have the oppurtunity to look at some of the plans you can find online, I highly recommend that you do.
I've also been eagerly awaiting the arrival of more roomboxes - about twelve boxes are coming there way!
Also, I've been having a long debate with myself: Should I rename Lockwood Manor to Clarendon Manor? Clarendon sounds fancier, but then, over the years, I've devoted an awful lot of time to plans and papers (not to mention this blog) of the dollhouse, that all have the name Lockwood Manor. If you have any suggestions, please let me know!
Have a wonderful Halloween!


Thursday, October 20, 2022
The Current Servant's Quarters
Well. . . . I thought today that I would take the time to complain about how dreadfully slow I am to work on the servant's rooms in my dollhouse. Today I have approximatly four finished. Yes, four. That might not sound too bad, but out of about thirteen or so, I'm afraid it is.
The ones that I do have finished, however, used to be five until I went through the entire process of ripping out the servant's entrance. Don't worry about that, for I'm almost done with the staircase and have printed out replacement wallpaper! I will follow up with a post on how that's going.
But for the servant's rooms that are indeed finished, includes:
 The Scullery I chose the black-and-white image because you've already seen the color one, and I was having fun playing around with Google Photos.
 Servant's Bedroom The bedroom of whom, is the question, but I do not have the answer.
 The Butler's Pantry I think it needs something on the back wall! Keep in mind that the photo is outdated, it looks much better now.
 Sara's Bedroom The bedroom belonging to Sara, the maid, who once had a very elaborate backstory behind her that I wrote up - I'll see if I can find it.
I should really work on more of the servant's rooms. . . I Love Lucy, here I come!
I'm afraid that lots of posts here may be about the servant's and their quarters, for they have been neglected for the past year - it's time for that to change! And I mentioned Sara's elaborate backstory - something about her aunt Mildred who kicked her out of her house and sent her to find work somewhere else, I believe!
Hopefully the servant's rooms will be expanding soon - until then, stay safe and well!
Sara's Bedroom The bedroom belonging to Sara, the maid, who once had a very elaborate backstory behind her that I wrote up - I'll see if I can find it.
I should really work on more of the servant's rooms. . . I Love Lucy, here I come!
I'm afraid that lots of posts here may be about the servant's and their quarters, for they have been neglected for the past year - it's time for that to change! And I mentioned Sara's elaborate backstory - something about her aunt Mildred who kicked her out of her house and sent her to find work somewhere else, I believe!
Hopefully the servant's rooms will be expanding soon - until then, stay safe and well!
 The nursery all lit up.


Saturday, October 15, 2022
Catching Up
I haven't done much miniature work for the past few days, so when I took a look at my dollhouse - it was a mess!
 George's room was especially messy - I hadn't done much work there for a few weeks, so I figured, there's no better time then the present!
 So I emptied it, and decided to get right down to business. The first step, of course, was to fix the stained glass in the window.
 Here it is from quite a few posts ago.
As you can see, I left the stained glass messy and unfinished - an error I needed to fix right away! The first thing I did were quite a few experiments - I wanted to make a window valance.
My only problem was that I didn't know how, so it became a little bit messy.
Here it is from quite a few posts ago.
As you can see, I left the stained glass messy and unfinished - an error I needed to fix right away! The first thing I did were quite a few experiments - I wanted to make a window valance.
My only problem was that I didn't know how, so it became a little bit messy.
 I picked a pretty fabric that I assumed would match with the blue-green color scheme of the room.


 All of those images you see are a quick succession of making the window valence (or, what was supposed to be the window valance.
 When I was about halfway done, I taped it up to the window to get the general effect, and I didn't like it at all.
Back to the square one!
When I was about halfway done, I taped it up to the window to get the general effect, and I didn't like it at all.
Back to the square one!
 I decided to go back to my original idea - bamboo window blinds.
Above where the two choices I had: plain blinds, and a sort of green-distressed blind. I chose the plain blinds, and we were off again!
I decided to go back to my original idea - bamboo window blinds.
Above where the two choices I had: plain blinds, and a sort of green-distressed blind. I chose the plain blinds, and we were off again!
 I held it up and liked it, but you didn't get the effect I wanted - that is, it was a bit unhospitable, and it covered up to much of the window to see out of, and after all, I just needed enough for it to cover up the stained glass window. I thought that it was a bit unnecessarily long.
 So I cut it in half.
It looked swell, but I disliked the long white string that was danling from it - it was needed to pull the blinds up (if they worked), but I thought it needed to be attached to something, so I made a tiny piece of fake tape.
So I cut it in half.
It looked swell, but I disliked the long white string that was danling from it - it was needed to pull the blinds up (if they worked), but I thought it needed to be attached to something, so I made a tiny piece of fake tape.
 You can see the fake tape in the photo above - I made it stick using my sticker machine from Paper Source.
 With that sorted, I took that oppurtunity to photograph the little outlet I had promised to show a photo of. There are actually two in the room.
 And with a penny for scale.
 Then I positioned two rugs on the floor and liked the effect. I especially like the green colors - they are both fabric samples.
 There is also a little hole in the wall to thread any wires through when I add the electric lights.
 Luckily, even with the blinds up, you can still see light shining through the stained glass windows.
 I added a bit of knick-knacks on the shelves. I still need some toys for the top shelf.
 The entire room - you can see that on the middle shelf I added some kind of horn - apparently George plays an instrument!
 I made some little pencils and stuck them in a little jar with a label - there is an eraser next to them.
 With sun streaming through the windows, it makes George's room look very cosy!
All I need to do now are fill up the top shelf and reattach the airplane that felt down!
See you next week!
Signing off with a old fashioned-looking photo of George's fireplace - I think it looks very 1930s!
With sun streaming through the windows, it makes George's room look very cosy!
All I need to do now are fill up the top shelf and reattach the airplane that felt down!
See you next week!
Signing off with a old fashioned-looking photo of George's fireplace - I think it looks very 1930s!


Subscribe to:
Posts (Atom)
A Warm Welcome
Originally, I was going to put the back stairs on the left side of the dollhouse. However, after the demolition of the original back stairs ...

-
 Originally, I was going to put the back stairs on the left side of the dollhouse. However, after the demolition of the original back stairs ...

